Programming Poppy robots using Snap!
Snap! is a blocks-based graphical programming language that allows users to create interactive animations, games, and more, while learning about mathematical and computational ideas.
Snap! was inspired by Scratch (a project of the Lifelong Kindergarten Group at the MIT Media Lab), but also targets both novice and more advanced users by including and expanding Scratch's features.
Snap! is open-source and it is entirely written in javascript, you can use it from the official website but you can also use a copy of the website in your personal computer and open the snap.html file in your browser.
Even if Snap! use JavaScript and HTML5 which are browser independent technologies, opening blocks for Poppy robots in Snap! is far faster in a web browser based on Webkit engine. We strongly recommend you to use Chromium Browser (which is very similar to Chrome without tracking tools), or Google Chrome.
Introduction to Snap! programming
This chapter will focus on things necessary to understand in Snap! for using Poppy creatures.
If you want a well designed online lesson on Snap! we strongly encourage you to look at the "Beauty and Joy of Computing" (BJC) course made by the University of Berkeley for New York high school students.
Some of the snapshots and concepts of BJC have been used for writing this chapter.
Connect your robot to Snap!
If you use a simulated robot on CoppeliaSim
You need to have installed Poppy software libraries and CoppeliaSim simulator on your computer. If it is not done, go to the install poppy software section.
First open CoppeliaSim.
The quickest way is to use the command line utility poppy-service. Copy and press enter to execute the command below in your command prompt (windows) or terminal (OSX and Linux):
poppy-services poppy-ergo-jr --snap --vrep
Substitute 'poppy-ergo-jr' with 'poppy-humanoid' or 'poppy-torso' to launch respectively a Poppy Humanoid or a Poppy Torso.
It will open a Snap! tab in your web browser for a simulated poppy-ergo-jr. If it is not automatically done, you can open Snap with preloaded blocks at simu.poppy-project.org/snap/
Every popup in CoppeliaSim will block the communication to the robot interface. If a popup appear, close it and restart the command above.
Alternative method:
Instead of using poppy-service you can start it in full python:
# use PoppyTorso PoppyHumanoid or PoppyEgoJr depending on what you want
from pypot.creatures import PoppyErgoJr
poppy = PoppyErgoJr(simulator='vrep', use_snap=True)
If you use a simulated robot on poppy-simu (web viewer)
You need to have installed Poppy software libraries on your computer. If it is not done, go to the install poppy software section.
The quickest way is to use the command line utility poppy-service. Copy and press enter to execute the command below in your command prompt (windows) or terminal (OSX and Linux):
poppy-services poppy-ergo-jr --snap --poppy-simu
poppy-simu is only available for poppy-ergo-jr. Other creatures are only supported in CoppeliaSim.
It will open a Snap! tab in your web browser for a simulated poppy-ergo-jr. If it is not automatically done, you can open Snap with preloaded blocks at simu.poppy-project.org/snap/ and the robot viewer at simu.poppy-project.org/poppy-ergo-jr.
Alternative method:
Instead of using poppy-service you can start it in full python:
from pypot.creatures import PoppyErgoJr
poppy = PoppyErgoJr(simulator='poppy-simu', use_snap=True)
If you have a tangible robot
First, you must be connected to the same network LAN area than your robot (e.g. on the same router or Wifi).
You have to go on the web homepage of your robot with its URL. You can use its IP address (for example http://192.168.1.42) if you have a way to know it or its hostname like http://poppy.local. To find its IP address look at the zeroconf chapter. To use directly its hostname http://poppy.local you must have a Zeroconf software installed on your computer (aka "Bonjour print services for Windows" if you are running Windows).
The home page of your poppy creature should look like the snapshot below:
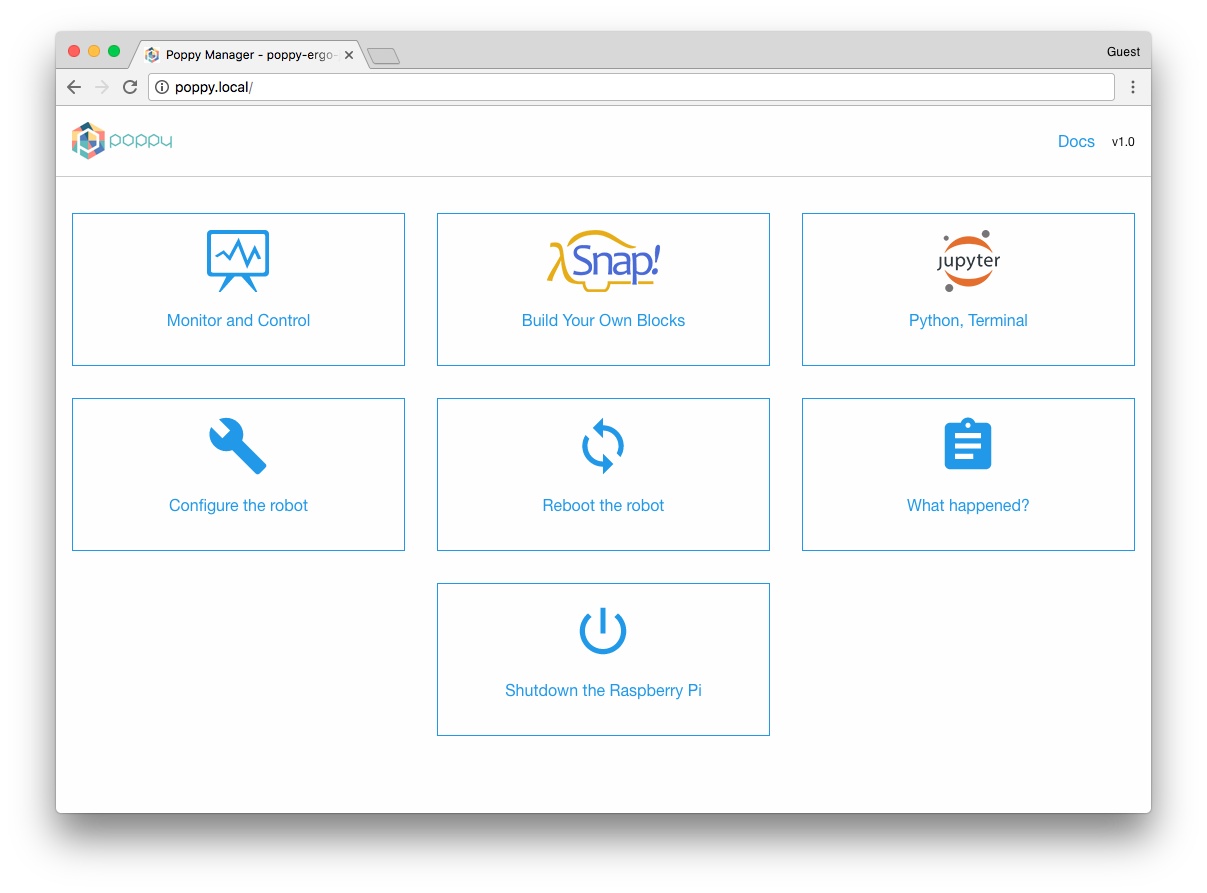
Click on the "Start Snap!" link to open the Snap! interface at start the connection with the Poppy robot.
Poppy special blocks are stored in the Examples. Go to "file" icon -> open -> Examples -> click on "Poppy blocks". It may take some time to load the blocks (~5-15 seconds), be patient.
Interface and general ideas
Saving in Snap!
There are three ways of saving a project in Snap!
Save the project in your web browser
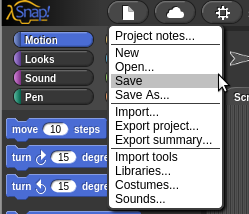
When you are not logged in Snap! Cloud, the default behaviour of Snap! is to save your project in your browser.
Technically this uses the Local Storage which is a memory space in your web browser where websites can store offline data. This is very convenient because you have not to register or to see Snap! project files, but keep in mind that these projects are only visible in this specific web browser in this specific computer.
Snap! Cloud
« There is no Cloud, it's just someone else's computer ».
Instead of saving your projects on your web browser, you can save them in Snap! servers in UC Berkeley, called "cloud". Moreover, this allows you to share your project with anyone, with a simple link.
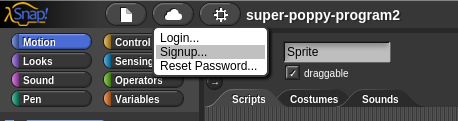
Create an account on Snap! cloud
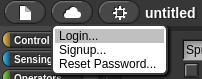
Click on the cloud button -> "signup...".
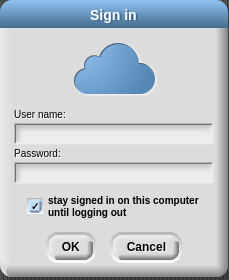
Fill the required fields in the modal window for signing up.
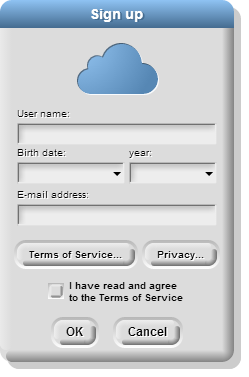
You will soon receive a validation email with a random password. You can now log in with your username and password.
If you use your personal computer, remember to check the "stay signed in on this computer [...]" checkbox.
After logging in account, you are free to change your password: click on the cloud button -> "Change Password".

Share your Snap! project
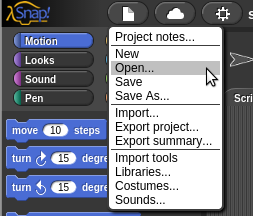
The big advantage of using Snap! Cloud is the ability to share a copy of your project with anyone. To share a Snap! project, you first need to be logged in Snap! Cloud and having your current project saved ("save" or "save as"). Go to the "open" menu:
In the cloud section, select the project you want to share and click on "Share" button.
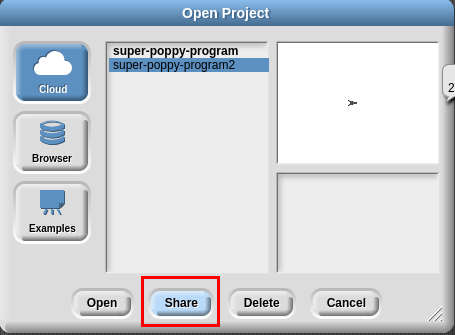
Here is the trick step: to see the share link, you have to click on the "Open" button.
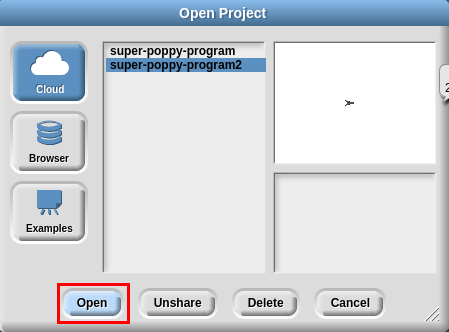
And this will re-open your project with the public sharing URL.

You can copy and paste the URL and share it by the way you want to your friends or to the Poppy community with the forum forum.poppy-project.org.
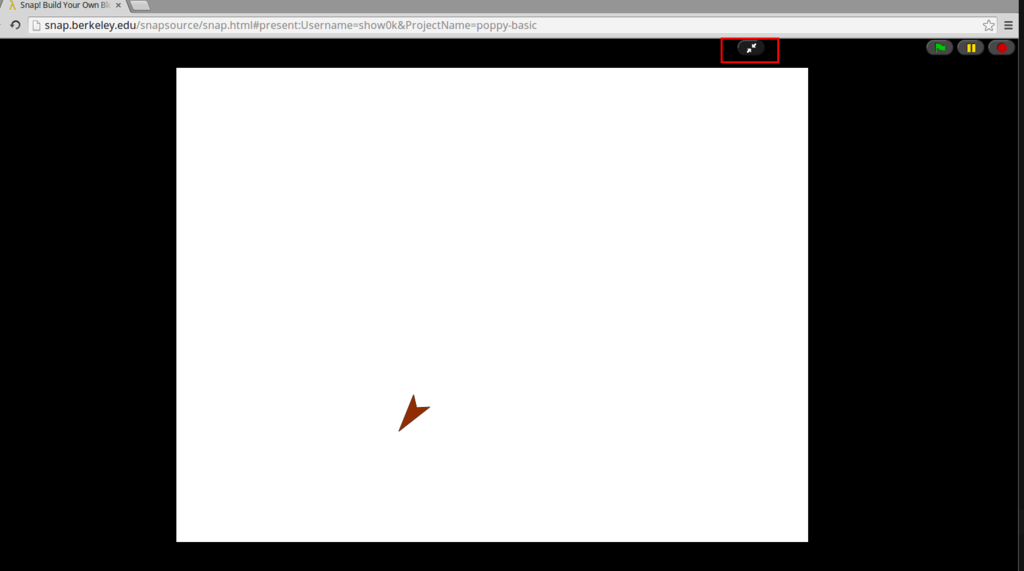
When you open a share project, the project is automatically opened in full screen on the sprite zone. To quit the full screen you have to click on the double arrow at the top of the snapshot below.
Export/Import your Snap! project
If you have a limited access to internet and you want to share project with other people, the best way is to export it:
A new tab in your web browser will be opened with an XML file like the picture below.
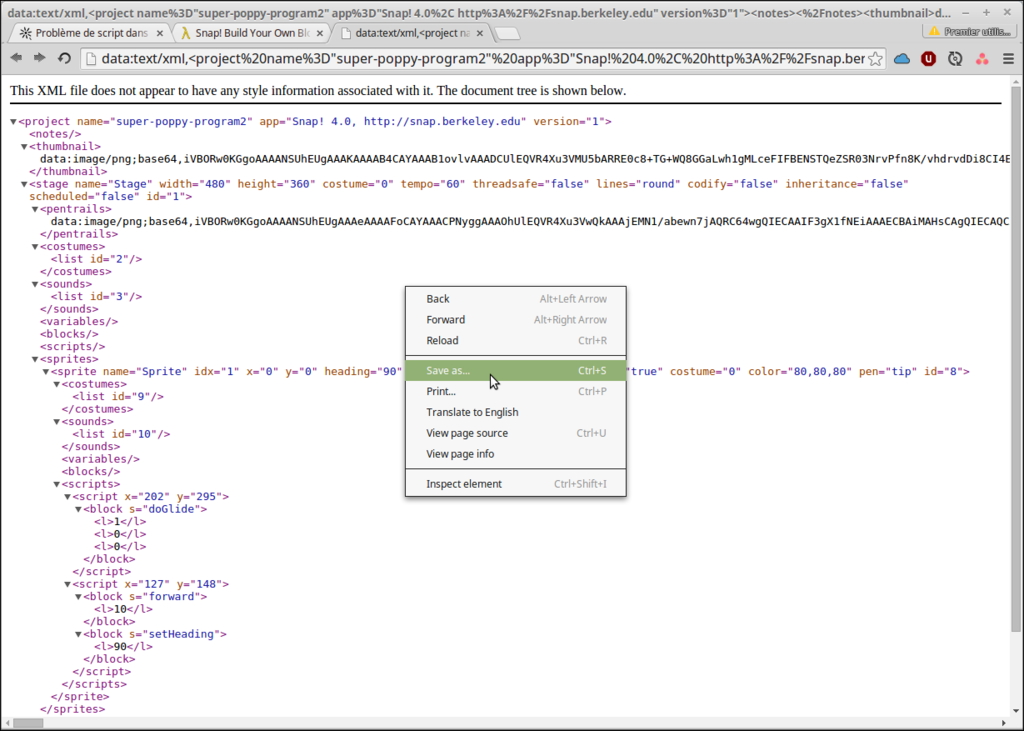 This file describe all your Snap! project in a a simple file. It's not made to be human readable so don't be afraid, you just have to save it on your computer. For that, do a right click, chose "save as" and a proper name and location on you computer for this project.
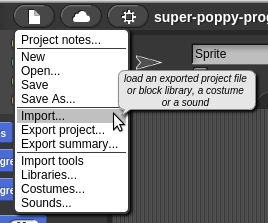
If you want to import a previously exported project, you simply have to click on the import section of the file icon.
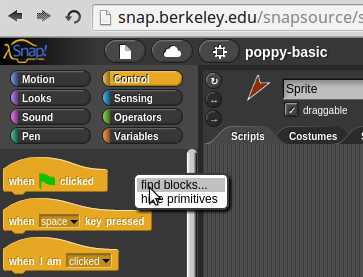
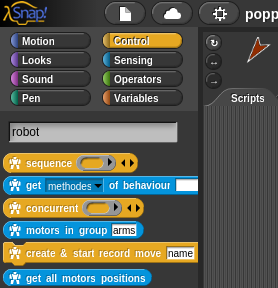
Search Poppy blocks
Every Poppy block in Snap! begins by a robot icon. So you can search all of them by the robot keyword. To search a specific block, do a right click on the block area, or use the keyboard shortcut CTRL+F.
Network
First test your connection with the (tangible or simulated) robot with the "test connection" block.
 .
if the block answer is "You may have connection troubles", your "host" variable inside the Snap! project is probably wrong. The host variable must be the IP or the hostname+".local" of your robot ; if you're using CoppeliaSim localhost is used to point to your own computer.
.
if the block answer is "You may have connection troubles", your "host" variable inside the Snap! project is probably wrong. The host variable must be the IP or the hostname+".local" of your robot ; if you're using CoppeliaSim localhost is used to point to your own computer.
 .
.
Build your own blocks!
The functionality to build your own block was the first difference between Scratch and Snap! (now it's also possible to make custom blocks in Scratch)!
Description of Poppy blocks
| Description | |
|---|---|
 |
This block allows you to connect Snap! to your robot. The host input can accept : - robot_name.local (e.g. : poppy.local if your robot’s name is poppy)- the IP address (e.g. 123.124.145.176) |
 |
Click on this block to verify that you are connected to your robot. |
 |
Put one or many motors in compliant or stiff mode. Motors are hand-drivable in compliant mode but must be in stiff mode to controlled with Snap!.The “motor(s)” input can accept:- string of a motor name (e.g. m1)- string of many motors separated with spaces (e.g. m1 m2 m4)- a Snap! list of motors like the reporter block "$robot all motors"" or the block “list”" |
 |
Put one or many motors in a position (angle in degree) in a given time.The “motor(s)” input can accept: - string of a motor name (e.g. m1) - string of many motors separated with spaces (e.g. m1 m2 m4) - a Snap! list of motors like the reporter block "$robot all motors"" or the block “list”. “Wait” can be true or false. If it’s on True, the action will wait the end of the previous action. If it’s on False, then the action will proceed during the previous one." |
 |
Restart the software inside the robot. |
 |
Put the value to one register (position, speed, max torque, …) of one or many motors. |
 |
Activate/deactivate color leds of motors and choose the color of your choice.The “motor(s)” input can accept: - string of a motor name (e.g. m1) - string of many motors separated with spaces (e.g. m1 m2 m4) - a Snap! list of motors like the reporter block "$robot all motors"" or the block “list” |
 |
Play a movement at a given speed. It is necessary to indicate the exact name of the movement previously recorded. This block can be nested in the “concurrent/sequential” block." |
 |
All blocks in input are run one after each other.You can use this block to play concurrently many sequently move. |
 |
All reports input are run simultaneously.You can use this block to play concurrently many recorded move. |
 |
Create and start a movement recorded by demonstration to the given motors. |
 |
Stop a record and save the recorded move in the robot.Be careful, you must have previously defined a move record with the "create & start record move ..."" block. |
 |
Stop a movement that is being played. |
 |
Play movements at the same time (can be nested to concurrent block). Inputs can be : - move name (string) - any reporter block, like sequential or play sequentially" |
 |
Play movements following in order (can be nested to sequential block). Inputs can be : - move name (string) - any reporter block, like sequential or play sequentially |
 |
Start/Stop/Pause/Resume an integrated behaviour of the robot. It can be a position, a movement, a sensorimotor loop, high level camera feature.. |
 |
Play a move in reverse at a given speed (reporter block) |
 |
Play a move at a given speed (command block) |
 |
Give motors which are in a given group. You can know groups name with the block “all motors groups”. |
 |
Return a list with the name of every motors in the robot. |
 |
Give the value of a register (position, speed, load, ... ) of one or many motors. |
 |
Give the position of every motors. It is a shortcut to the block above. It is useful to make a snapshot of pose of the robot. |
 |
Return the index of a motor name in the "all motors" block list. |
 |
Give the URL of the robot. For internal use only. |
 |
Give all records stored in this robot. |
 |
Give the list of all attached/running behaviours . |
 |
Give all existing motors groups. |
 |
Get all methods or functions which are runnable in a behavior.It is an advanced block. |
 |
Return a boolean (true/false) depending if the selected card is detected by the camera of the robot. Download cards here. |